Is that pesky tap in your kitchen or bathroom dripping away? Not only is it annoying, but it’s also a waste of water! Fortunately, a worn-out washer is often the culprit behind this common issue, and replacing it is a straightforward DIY task. In this guide, we’ll walk you through the steps to fix a washer for taps so you can restore peace to your home.
What You’ll Need
Before diving in, gather the following tools and materials:
- New washer (specific to your tap type)
- Adjustable wrench
- Screwdriver (flathead and Phillips)
- Towels or a bucket
- Plumber’s grease (optional)
Step 1: Turn Off the Water Supply
Your first step is to ensure your safety. Locate the shut-off valve under your sink and turn it clockwise to close it. To drain any remaining water, turn on the tap until it runs dry.
Step 2: Plug the Drain
To avoid losing any small parts during the process, cover the drain with a sink plug or a towel. This simple step can save you a lot of frustration later on!
Step 3: Remove the Tap Handle
Next, it’s time to take off the tap handle. Using the appropriate screwdriver, remove any screws holding the handle in place. If there’s a decorative cap, gently pry it off with a flathead screwdriver to reveal the screws underneath. Once all screws are removed, carefully lift off the handle.
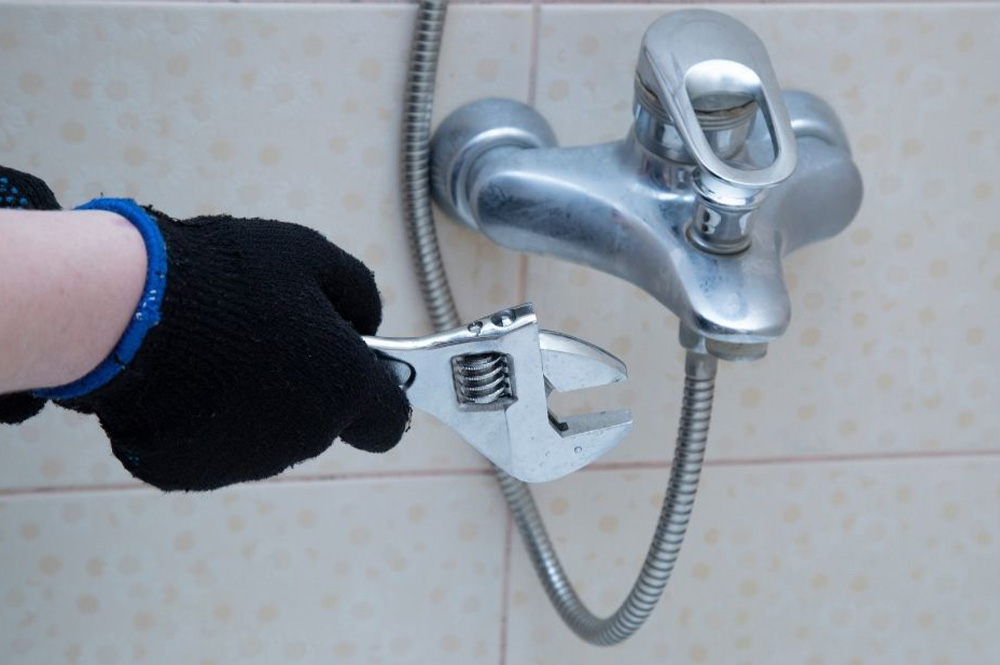
Step 4: Take Out the Packing Nut
With the handle off, you’ll see the packing nut beneath it. Use your adjustable wrench to loosen this nut by turning it counterclockwise. Be cautious to avoid scratching the finish on the tap.
Step 5: Replace the Washer
Now, for the main event! Pull out the stem assembly gently to expose the old washer at the bottom. Remove the worn washer and replace it with a new one of the same size. Ensure the new washer fits snugly and sits flat against the surface.
Step 6: Reassemble the Tap
For smooth operation, apply a small amount of plumber’s grease to the threads of the stem assembly. Reinsert it into the tap body and secure it with the packing nut. Hand-tighten it first, then give it a gentle turn with the wrench—just enough to hold it securely without overtightening.
Step 7: Reattach the Tap Handle
Now, place the tap handle back on, ensuring it aligns properly. Secure it with screws and replace any decorative caps you removed earlier.
Step 8: Turn the Water Supply Back On
Finally, it’s time to turn the water supply back on. Slowly open the valve and check for any leaks. If everything looks good, congratulations—you’ve fixed your tap!
Conclusion
Fixing a washer for taps is a simple yet effective way to eliminate those annoying drips and conserve water. However, if you find yourself facing more complex plumbing issues or if the problem persists, it might be time to call in the experts. At Ohana Plumbing, we’re committed to providing you with transparent and trustworthy service for all your plumbing needs. Whether it’s a simple washer replacement or a more complex repair, our expert team is here to help. Contact us today to schedule a service or for any plumbing inquiries! Let us take care of your plumbing, so you can enjoy a drip-free home!